
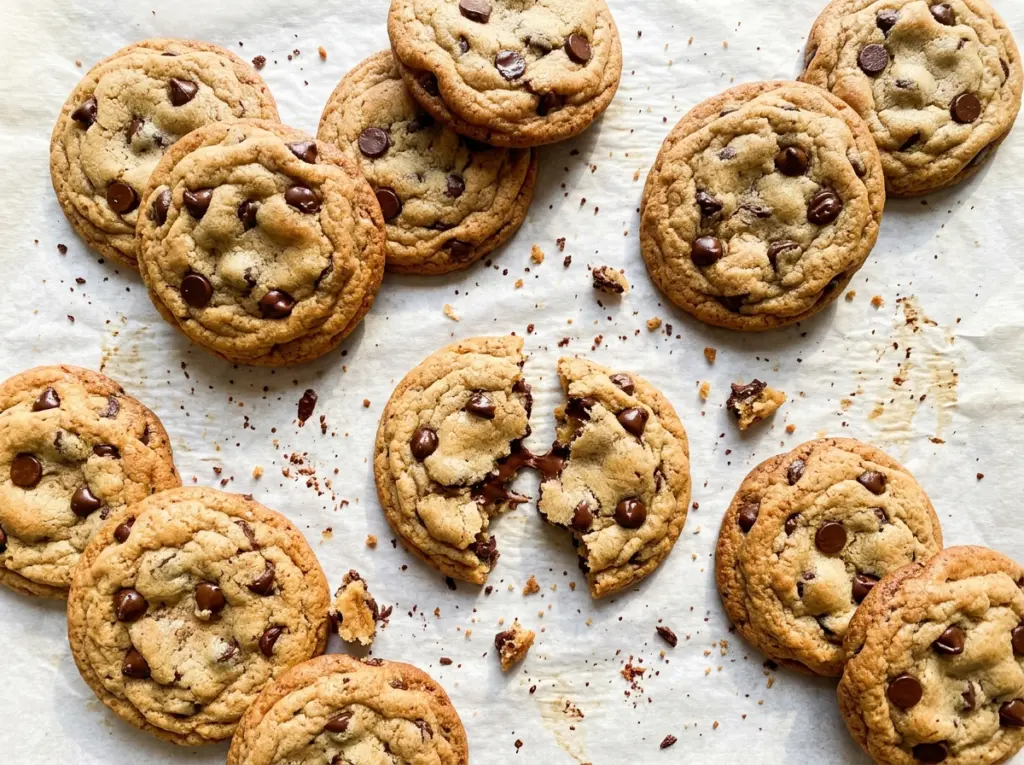
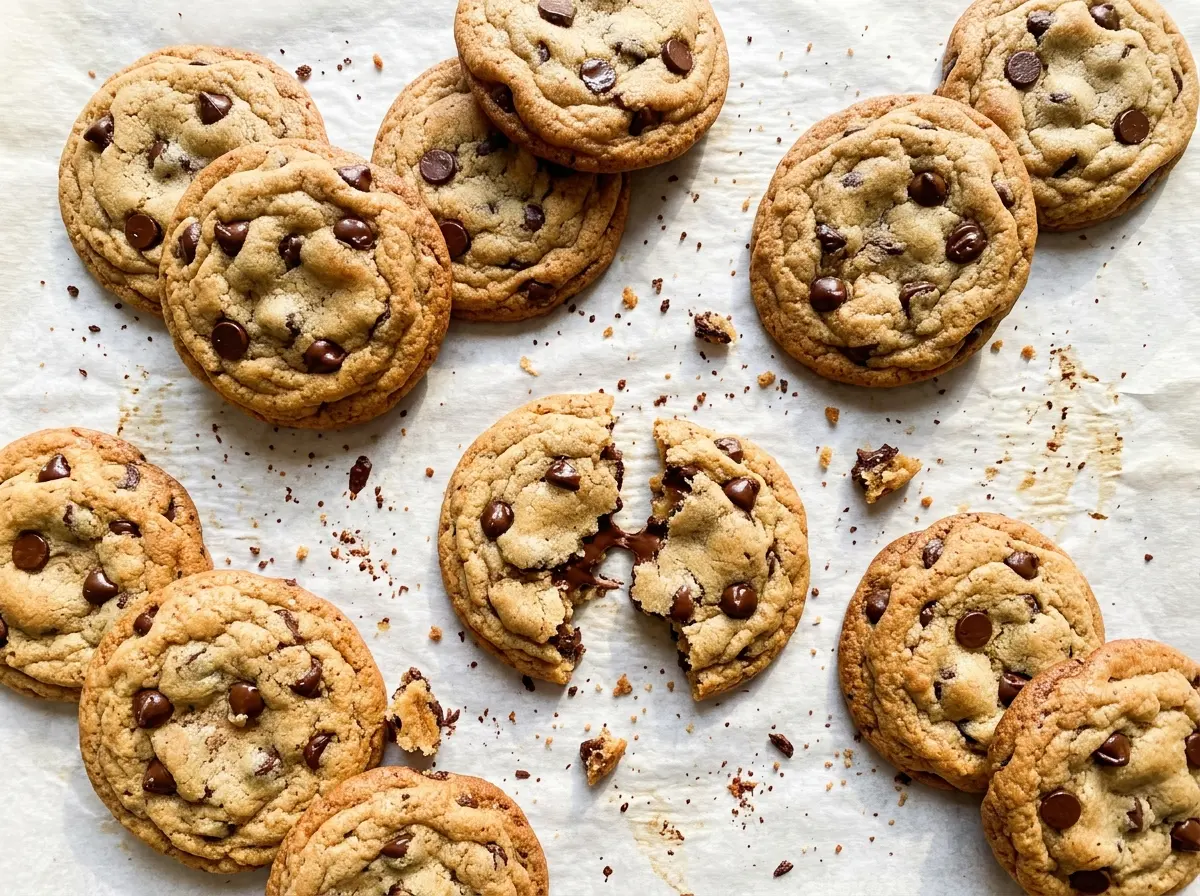
The first clue that a batch is ready isn’t a firm-looking center. When the edges turn golden but the middle still looks a little soft, it’s time to pull the pan. These classic chocolate chip cookies finish setting as they cool, which is how you get a tender middle instead of a dry, crunchy cookie all the way through.
I keep the dough simple: softened butter, two kinds of sugar, and semisweet chocolate chips. Creaming the butter and sugars until creamy gives the dough a smooth start, while mixing in the flour only until the dry streaks disappear keeps the cookies from turning dense. The chocolate melts into little pockets as the edges brown, and the first warm cookie is hard to leave alone.
Kitchen Note
The butter should feel soft when you press it, but it shouldn’t look shiny or oily. Butter that’s starting to melt can make the dough greasy before it even reaches the oven.
Save these classic chocolate chip cookies for a soft-centered batch with golden edges and semisweet chocolate in every bite.
Why a Soft Center Is the Right Doneness Cue
Chocolate chip cookies can look unfinished right when they’re ready to come out of the oven. The edges should be golden, but the centers should still look slightly soft. If you wait for the middle to look completely firm on the hot baking sheet, the cookies keep cooking after they leave the oven and can end up drier than you wanted.
That contrast between edge and center is especially useful because color gives you a clearer cue than the timer alone. Start checking at the lower end of the baking window, then look at the edges and middle before deciding whether the pan needs another minute or two. Oven timing can vary, but the visual target stays the same: golden edges and a center that hasn’t fully set. Letting the cookies sit on the baking sheet for five minutes gives them a chance to firm up enough to move without losing that soft middle.
It’s also why these cookies shouldn’t be crowded together. Each portion needs room for its edges to bake evenly, and a little space between cookies makes it easier to read those color cues. The result is a batch with crisp-looking rims and centers that stay tender after cooling.
What the Sugars, Butter, and Chocolate Each Bring
- All-purpose flour — It gives the cookies enough structure to hold their shape without making them breadlike. Spoon flour into the measuring cup and level it rather than packing it down; too much flour can leave the dough stiff and the baked cookies dry. A cup-for-cup gluten-free baking flour blend is the most practical swap, though the texture may be a little more delicate.
- Unsalted butter — Butter carries the rich, familiar cookie flavor and helps the sugar cream into a cohesive base. Unsalted butter gives you control over the salt already included in the dough. If you use salted butter instead, reduce the added salt to account for it.
- Granulated and brown sugars — The granulated sugar supports browning and crisp edges, while the packed brown sugar brings moisture and a softer, chewier bite. Dark brown sugar works in place of light brown sugar if that’s what you have; it gives the cookies a deeper molasses note. Pack it firmly in the measuring cup so the amount stays consistent.
- Eggs and vanilla — Eggs bind the dough and add moisture, while vanilla rounds out the buttery, chocolatey flavor. Large eggs are the right size here; smaller eggs can leave the dough drier. A basic pure or imitation vanilla is fine because it’s mixed into the dough rather than used as the main flavor.
- Baking soda — This leavener helps the cookies spread and brown. It isn’t interchangeable one-for-one with baking powder, which behaves differently and can change the cookies’ texture and flavor.
- Semisweet chocolate chips — Chips hold their shape better than chopped chocolate, so you get distinct bites of chocolate throughout the cookie. A good-quality bag is nice, but any semisweet chips you enjoy eating will work. Bittersweet chips are an easy swap if you prefer a less-sweet chocolate bite.
From Creamed Butter to Golden Edges
Whisk the Dry Ingredients Evenly
Whisk the flour, baking soda, and salt together in a medium bowl before they go into the butter mixture. This spreads the leavener and salt through the flour so you don’t get concentrated pockets in a finished cookie. Break up any flour lumps with the whisk as you go. Set the bowl aside while you cream the butter and sugars.
Cream the Butter and Sugars
Beat the softened butter with both sugars in a large bowl until creamy, about two minutes. Scrape down the sides of the bowl if sugar is clinging there, then continue until the mixture looks evenly combined rather than streaky. Beat in the vanilla and eggs one at a time, letting each egg incorporate before adding the next. If the mixture looks a little uneven, keep mixing just until it comes together.
Bring the Dough Together Without Overworking It
Add the flour mixture to the butter mixture and mix just until no dry streaks remain. A few seconds too much mixing can make the cookies tougher, so stop as soon as the flour disappears. Stir in the semisweet chocolate chips so they’re spread through the dough. Don’t keep beating once the chips are in; a few folds are enough.
Scoop, Bake, and Let the Cookies Set
Heat the oven to 375°F and line two large baking sheets with parchment paper. Scoop the dough into 2-tablespoon portions, spacing them about 2 inches apart, and bake one sheet at a time for 9 to 11 minutes. Pull the pan when the edges are golden and the centers still look slightly soft. Let the cookies cool on the baking sheet for five minutes, then transfer them to a wire rack to cool completely.
Three Easy Ways to Change Up the Batch
Use Bittersweet Chips for a Less-Sweet Cookie
Replace the semisweet chips with the same amount of bittersweet chips. The cookies keep their familiar shape and texture, but each bite tastes darker and less sweet.
Bake a Gluten-Free Batch
Use a cup-for-cup gluten-free baking flour blend in place of the all-purpose flour. The cookies may be a little more fragile, so let them finish setting on the baking sheet before moving them to the rack.
Make Them Dairy-Free
Swap in a firm, stick-style dairy-free butter and dairy-free chocolate chips. Softened stick butter creams more like the butter in the original dough than a tub spread, though the cookies may spread a little differently.
Storage and Reheating
- Refrigerator: Keep cooled cookies in an airtight container for up to 1 week. They’ll firm up in the refrigerator, so bring them to room temperature for a softer bite.
- Freezer: Freeze completely cooled cookies in an airtight freezer container for up to 2 months. Separate layers with parchment so they don’t stick together.
- Reheating: Microwave a cookie for about 8 seconds to soften it slightly. Longer heating can make the chocolate very hot and the cookie tough, so warm it in short bursts.
Questions That Come Up When Baking These Cookies
Classic Chocolate Chip Cookies
Ingredients
Equipment
Method
- Heat the oven to 375°F and line two large baking sheets with parchment paper.
- Whisk the flour, baking soda, and salt together in a medium bowl.
- Beat the softened butter, granulated sugar, and brown sugar in a large bowl until creamy, about 2 minutes.
- Beat in the vanilla and eggs, one at a time, until combined.
- Add the flour mixture and mix just until no dry streaks remain.
- Stir in the chocolate chips.
- Scoop the dough into 2-tablespoon portions onto the prepared baking sheets, spacing them about 2 inches apart.
- Bake one sheet at a time for 9 to 11 minutes, until the edges are golden and the centers still look slightly soft.
- Let the cookies cool on the baking sheet for 5 minutes.
- Transfer them to a wire rack to cool completely.




