
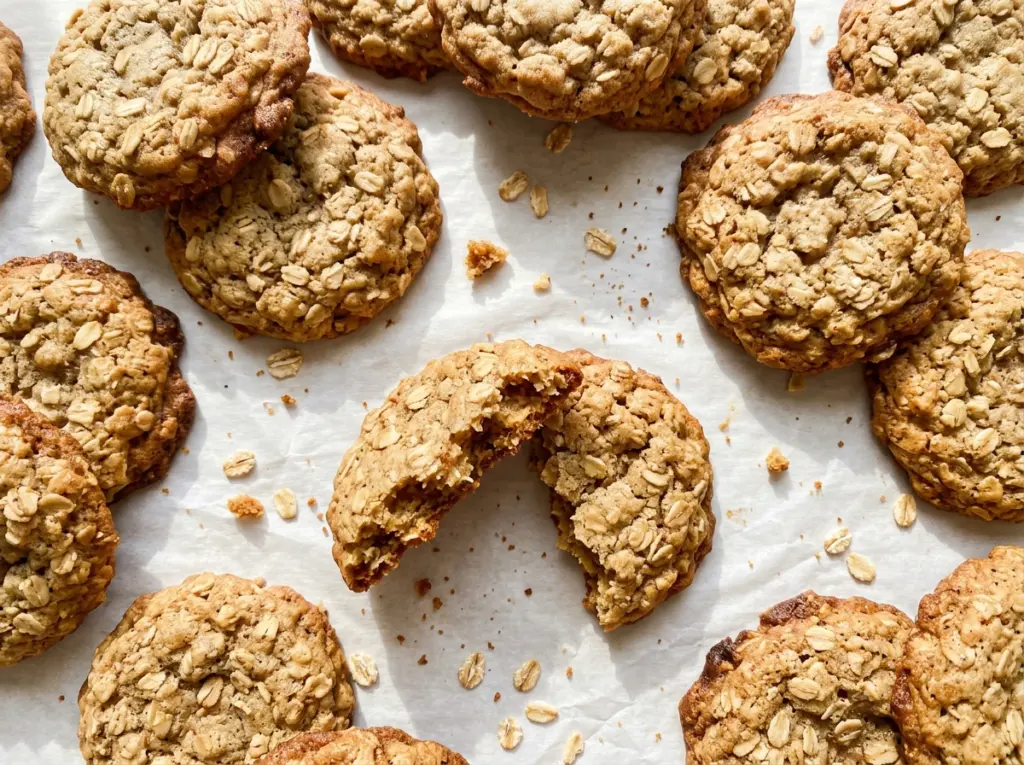
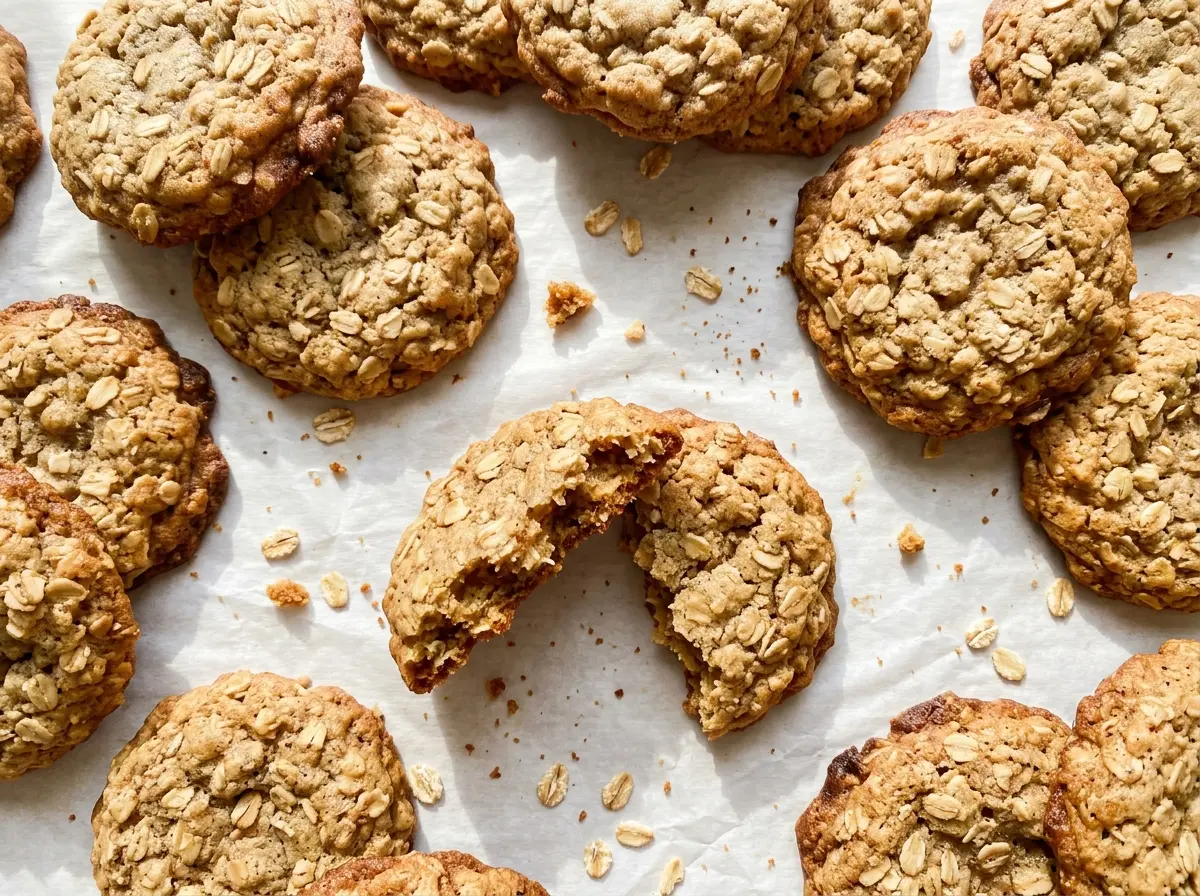
The first thing I watch for with oatmeal cookies is the edge: it should turn golden while the middle still looks a little soft. Pull them at that point, and the hot baking sheet finishes the centers without drying them out. That small visual cue makes a big difference in these chewy oatmeal cookies, especially when the oats make the dough look sturdier than it really is.
I use both a whole egg and an extra yolk, and I give the dough a short rest in the refrigerator before scooping. The yolk adds richness, while chilling firms the dough enough to portion neatly. Old-fashioned oats keep their distinct texture instead of disappearing into the dough, so each cookie has a tender center with plenty of oat chew.
These are the cookies I reach for when I want a familiar cinnamon note and a soft bite, not a crisp, thin cookie. The edges set, the centers stay tender, and the oats are still easy to spot.
Kitchen Note
Let the egg and yolk come to room temperature before mixing them in. Cold eggs can make the creamed butter look lumpy, so I take them out while I measure the dry ingredients.
Save these chewy oatmeal cookies for a bake that keeps its soft centers and golden edges without complicated steps.
Why the Oats Go In After the Flour
The order of mixing helps you keep the cookies tender. First, the flour, baking soda, cinnamon, and salt are whisked together so the leavener and seasoning are distributed before they meet the wet ingredients. The flour mixture then goes into the creamed butter and sugars on low speed, just until the dry streaks disappear. That short mixing window matters: once flour is hydrated, continued beating can develop more gluten and make a cookie firm instead of pleasantly chewy.
The oats go in last, after the flour is incorporated. They need only enough stirring to spread through the dough; beating them in with the flour from the start makes it harder to judge when the dough is mixed and can encourage overmixing. The 30-minute refrigerator rest then gives the dough time to firm up before portioning. You’ll get scoops that hold their shape on the baking sheet instead of slumping as soon as they hit the oven.
There’s a useful balance here: mix the flour only until it disappears, then distribute the oats evenly without trying to make the dough smooth. A few visible oat flakes throughout the dough are exactly what you want.
What the Butter, Sugars, and Oats Bring to These Cookies

- Old-fashioned rolled oats — These give the cookies their recognizable oat texture and hearty chew. Choose rolled oats that are fresh and dry; the least expensive plain version is fine. Quick oats break down more and make a finer, softer texture, while steel-cut oats are too firm for this dough. There isn’t a one-for-one swap that keeps the same result.
- Unsalted butter — Butter carries the cookie’s rich flavor and helps the sugars cream into a smooth base. Use butter that’s softened but not melted; a basic store-brand butter works well, and premium butter isn’t necessary. Stick with unsalted here because the dough has a separately measured amount of kosher salt.
- Light brown and granulated sugars — Using both gives the dough a balance of moisture and sweetness, while the packed brown sugar brings a gentle molasses note. Light brown sugar is the intended choice; dark brown sugar has a stronger molasses flavor and would shift the taste. Pack the brown sugar into the measuring cup so the amount is consistent.
- Egg and egg yolk — The whole egg binds the dough, and the extra yolk contributes richness. Use large eggs, as listed, and bring both to room temperature so they blend into the butter mixture smoothly. Leaving out the yolk changes the dough’s balance, so I don’t recommend that swap for this batch.
- Flour, baking soda, cinnamon, and vanilla — All-purpose flour gives the cookies their structure, and baking soda helps them spread and brown. A fresh baking soda is worth using if yours has been open for a long time; stale leavener can leave cookies flatter. Ground cinnamon supplies the warm spice, while vanilla rounds out the dough. Use a measuring spoon for the leavener and cinnamon so they don’t overwhelm the oats.
From Creamed Butter to Soft-Centered Cookies
Whisk the Dry Ingredients First
Whisk the flour, baking soda, cinnamon, and kosher salt together in a medium bowl until the cinnamon is no longer gathered in streaks. This distributes the small amounts evenly before you add them to the larger bowl. Set the mixture aside while you cream the butter and sugars. If you spot a clump of baking soda, break it up now rather than trying to work it into the finished dough.
Cream the Butter and Sugar, Then Add the Eggs
Beat the softened butter with both sugars on medium speed until creamy, about 2 minutes. Scrape down the bowl as needed so butter and sugar aren’t left stuck along the sides. Beat in the room-temperature egg, yolk, and vanilla until combined, scraping the bowl again if the mixture clings to it. The mixture should look evenly blended before the flour goes in.
Mix in the Flour, Fold in the Oats, and Chill
Add the dry mixture on low speed and stop as soon as no dry streaks remain. Stir in the oats after that, using only enough mixing to distribute them through the dough. Cover the bowl and refrigerate the dough for 30 minutes; while it chills, heat the oven to 350°F and line two rimmed baking sheets with parchment paper. Don’t try to skip the rest—the dough is easier to portion after it has firmed.
Scoop, Bake, and Let the Centers Set
Scoop the dough into 24 portions of about 2 tablespoons each, arranging 12 on each baking sheet with about 2 inches between them. Bake one sheet at a time for 10 to 12 minutes, until the edges are golden and the centers still look slightly soft. If you wait for the centers to look fully firm in the oven, the cookies can turn dry as they finish cooking. Leave them on the baking sheet for 5 minutes, then transfer them to a wire rack to cool completely.
Two Simple Ways to Adapt the Batch
Bake a Half Batch
Halve every ingredient and portion the dough into 12 cookies, keeping each scoop about 2 tablespoons. The cookie size and method stay the same, so use the same oven temperature and begin checking at the same 10-minute mark. This is a practical option when you want a smaller bake without changing the character of the cookies.
Leave Out the Cinnamon
For a milder, more oat-and-vanilla-forward cookie, omit the ground cinnamon and keep the rest of the ingredient list and method unchanged. The cookies will lose that familiar warm spice, but the dough still has its brown sugar and vanilla flavor. This is a flavor adjustment, not a gluten-free or dairy-free conversion; the flour, butter, and eggs remain part of the formula.
Storage and Reheating
- Refrigerator: Store cooled cookies in an airtight container for up to 1 week. They’ll firm up and lose some of their soft, chewy texture in the refrigerator.
- Freezer: Freeze fully cooled cookies in an airtight freezer-safe container for up to 2 months, separating layers with parchment. Thaw at room temperature while still covered to limit condensation on the cookies.
- Reheating: Warm a cookie in a 300°F oven for a few minutes, just until soft. Avoid leaving it in long enough to brown further, which can dry the edges.
Questions That Come Up While Baking Oatmeal Cookies
Chewy Oatmeal Cookies
Ingredients
Equipment
Method
- Whisk the flour, baking soda, cinnamon, and salt together in a medium bowl.
- Beat the butter, brown sugar, and granulated sugar in a large bowl with an electric mixer on medium speed until creamy, about 2 minutes.
- Beat in the egg, egg yolk, and vanilla until combined, scraping down the bowl as needed.
- Mix in the flour mixture on low speed just until no dry streaks remain.
- Stir in the oats.
- Cover the dough and refrigerate for 30 minutes.
- Meanwhile, heat the oven to 350°F.
- Line two rimmed baking sheets with parchment paper.
- Scoop the dough into 24 portions, about 2 tablespoons each.
- Place 12 portions on each prepared baking sheet, leaving about 2 inches between them.
- Bake one sheet at a time for 10 to 12 minutes, until the edges are golden and the centers still look slightly soft.
- Cool the cookies on the baking sheet for 5 minutes.
- Transfer the cookies to a wire rack to cool completely.




