
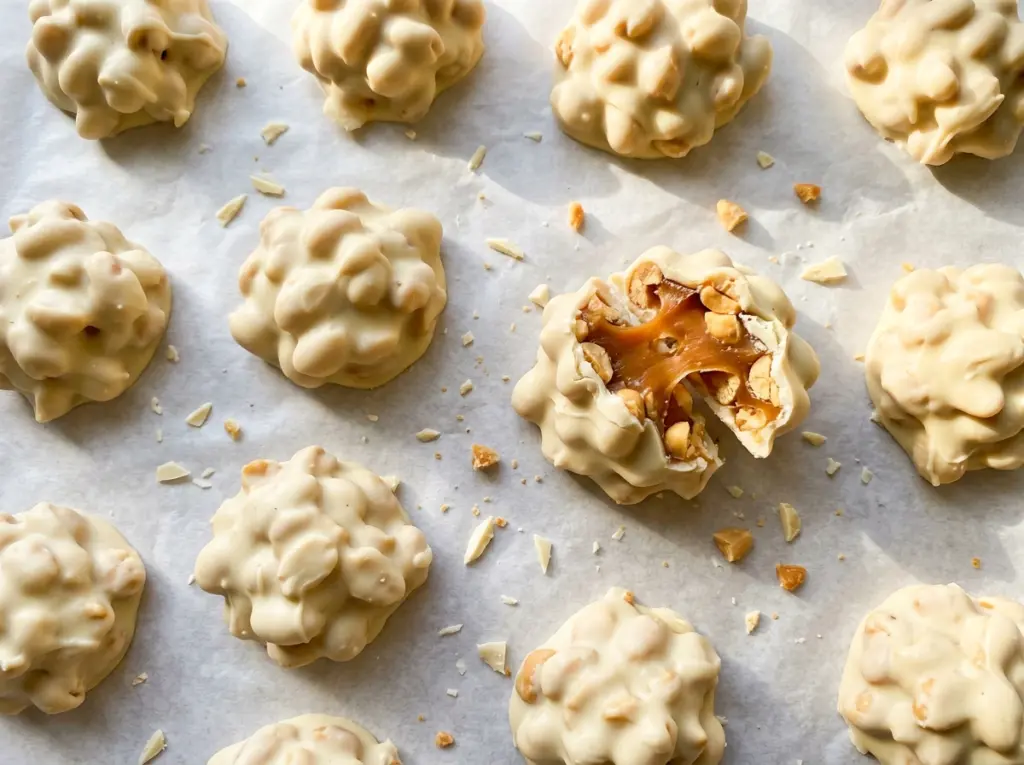
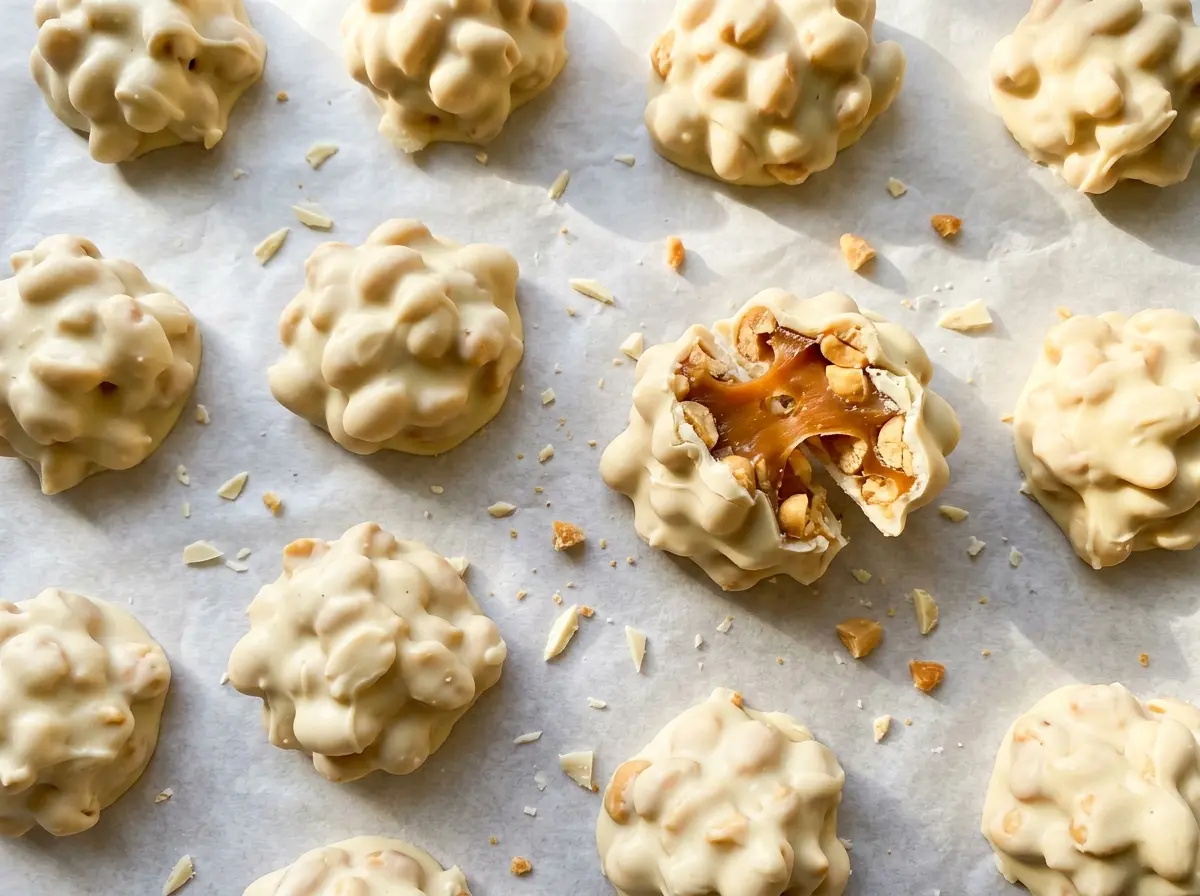
The caramel goes from stiff, separate pieces to a smooth, glossy mixture as it warms with the cream. Once the peanuts are stirred in, each spoonful holds together like a little craggy mound, ready for its white chocolate coat. These Polar Bear Paws candies bring salted, crunchy peanuts and chewy caramel into one sweet bite without needing a candy thermometer.
I like that the centers are made in one saucepan, then chilled before they’re dipped. That firming time makes the clusters easier to handle, while the salted dry-roasted peanuts keep the caramel from tasting one-note sweet. The white chocolate adds a creamy shell around the edges and settles into the gaps between the peanuts. Let the coating set, and you have a candy with a crisp shell, a soft center, and plenty of crunch.
Kitchen Note
Keep the caramel and cream over low heat, stirring often, until the mixture is completely smooth. I don’t turn up the burner to hurry it along; caramel can scorch before the last soft pieces have melted.
Save these Polar Bear Paws candies for a homemade treat with chewy caramel, salty peanuts, and a smooth white chocolate shell.
Why These Clusters Need a Chill Before They Meet the White Chocolate
Freshly mixed caramel and peanuts are sticky and pliable. That’s exactly what you want while forming the centers, but it makes dipping awkward: a warm cluster can slump into the bowl, shed peanuts, or leave a thick trail of caramel in the chocolate. Refrigerating the mounds gives the caramel time to firm up so each one keeps its shape when you lift and turn it.
Look for clusters that feel firm rather than tacky when you gently touch one. The full 25 to 30 minutes gives them time to hold together without turning the caramel into a hard, brittle center. If your refrigerator runs warm or the clusters are especially large, check the texture before dipping and give them a little more time if they still feel soft. Working with a firm center also makes it easier to let the excess white chocolate drip away cleanly.
Keep the chilled clusters on the lined baking sheet as you work, returning each coated candy to the same parchment. The cold centers may make the chocolate begin to set quickly, so it helps to dip one cluster at a time and let each one finish dripping before moving to the next.
What the Caramel, Peanuts, and White Chocolate Each Bring

- Soft caramels — Individually wrapped soft caramels melt into a cohesive center instead of a brittle candy. Choose fresh, pliable caramels; older, firm ones take longer to melt and can leave stubborn pieces in the pan. Caramel bits can work in place of the wrapped pieces if you use the same package weight, though the finished center may be a little firmer.
- Heavy cream — A small amount loosens the melting caramels so they coat the peanuts evenly and stay workable. Heavy cream’s richness helps keep the center chewy; swapping in a thinner milk can make the mixture softer and less predictable. There isn’t a straightforward dairy-free swap that preserves this exact caramel texture.
- Salted dry-roasted peanuts — Their dry, crunchy texture gives the centers structure, and the salt balances the sweet caramel and coating. A fresh package is worth choosing here, since stale peanuts lose their crunch. Salted dry-roasted cashews can replace them in the same volume for a milder, buttery variation; the candy will no longer have its classic peanut flavor.
- White chocolate — Chopped white chocolate melts into a smooth coating when warmed gently and stirred between intervals. Use chocolate you enjoy eating on its own, since it makes up the whole outer shell. White chocolate chips can stand in at the same weight, but they may melt thicker than chopped chocolate, so dip patiently and allow extra time for excess coating to drip back into the bowl.
Building the Centers and Dipping Without a Mess
Line the Pan and Melt the Caramel
Line a large rimmed baking sheet with parchment before you start; you’ll use it for both chilling the centers and setting the finished candies. Put the unwrapped caramels and heavy cream in a medium saucepan over low heat. Stir often as the caramels soften, scraping through the mixture so melted caramel doesn’t sit on the bottom. Take the pan off the heat when the mixture is smooth, with no firm pieces remaining.
Coat the Peanuts and Shape the Clusters
Stir the salted dry-roasted peanuts into the warm caramel until they’re evenly coated. Scoop rounded tablespoonfuls onto the lined sheet, shaping 18 individual clusters and leaving a little space between them. If a spoonful looks loose, press the peanuts gently into the caramel with the spoon so they stay together. Refrigerate for 25 to 30 minutes, until the centers are firm.
Melt the White Chocolate Gently
Put the chopped white chocolate in a microwave-safe bowl and heat it at 50% power in 20-second intervals, stirring after each one. White chocolate can hold its shape while softening, so stir thoroughly before deciding it needs another interval. Stop when it’s smooth and fluid, with no lumps. Keep water out of the bowl; even a little moisture can make melted chocolate turn grainy and stiff.
Dip, Drain, and Let the Shell Set
Dip each chilled cluster in the melted chocolate, turning it to cover the caramel and peanuts. Lift it over the bowl and let the extra coating drip back before placing it on the parchment; a patient drain helps avoid a thick pool around the base. Return each candy to the baking sheet, then refrigerate for 15 to 20 minutes until the white chocolate coating is set. The shell should look firm rather than glossy and wet.
Three Ways to Change the Shape or Crunch
Make Cashew Clusters
Replace the salted dry-roasted peanuts with salted dry-roasted cashews in the same volume. Cashews have a milder, buttery crunch, so the caramel comes through more clearly. Keep the rest of the process unchanged.
Shape Mini Paws
Use smaller spoonfuls of the caramel-peanut mixture for bite-size candies. You’ll get more pieces than the original 18, with a little more white chocolate shell in each bite. Because the centers are smaller, check them for firmness before dipping rather than assuming they need the full chilling time.
Drizzle Instead of Fully Dipping
For a lighter coating, set the firm clusters on parchment and drizzle melted white chocolate over the tops with a spoon instead of dipping each one. This uses less chocolate and leaves more of the caramel and peanuts visible, though the candies won’t have a complete shell around the sides.
Storage and Serving
- Refrigerator: Keep the candies in an airtight container for up to 2 weeks. Separate layers with parchment so the coating doesn’t stick, and expect the caramel to feel firmer when cold.
- Freezer: Freeze them in an airtight container for up to 2 months, with parchment between layers. Thaw in the refrigerator while still covered to limit condensation on the chocolate shell.
- Serving: Serve chilled or let a few candies sit briefly at room temperature if you prefer a softer caramel center. Avoid leaving the whole batch out for an extended stretch, especially in a warm room.
Questions That Come Up While Making Polar Bear Paws
Polar Bear Paws Candy
Ingredients
Equipment
Method
- Line a large rimmed baking sheet with parchment paper.
- Heat the soft caramels and heavy cream in a medium saucepan over low heat, stirring often, until smooth.
- Remove the pan from the heat and stir in the salted dry-roasted peanuts until evenly coated.
- Drop rounded tablespoonfuls of the mixture onto the prepared baking sheet, making 18 clusters.
- Refrigerate for 25 to 30 minutes until firm.
- Put the chopped white chocolate in a microwave-safe bowl and microwave at 50% power in 20-second intervals, stirring each time, until smooth.
- Dip each chilled cluster in the melted white chocolate, letting excess drip back into the bowl, then return it to the baking sheet.
- Refrigerate for 15 to 20 minutes until the coating is set.




