
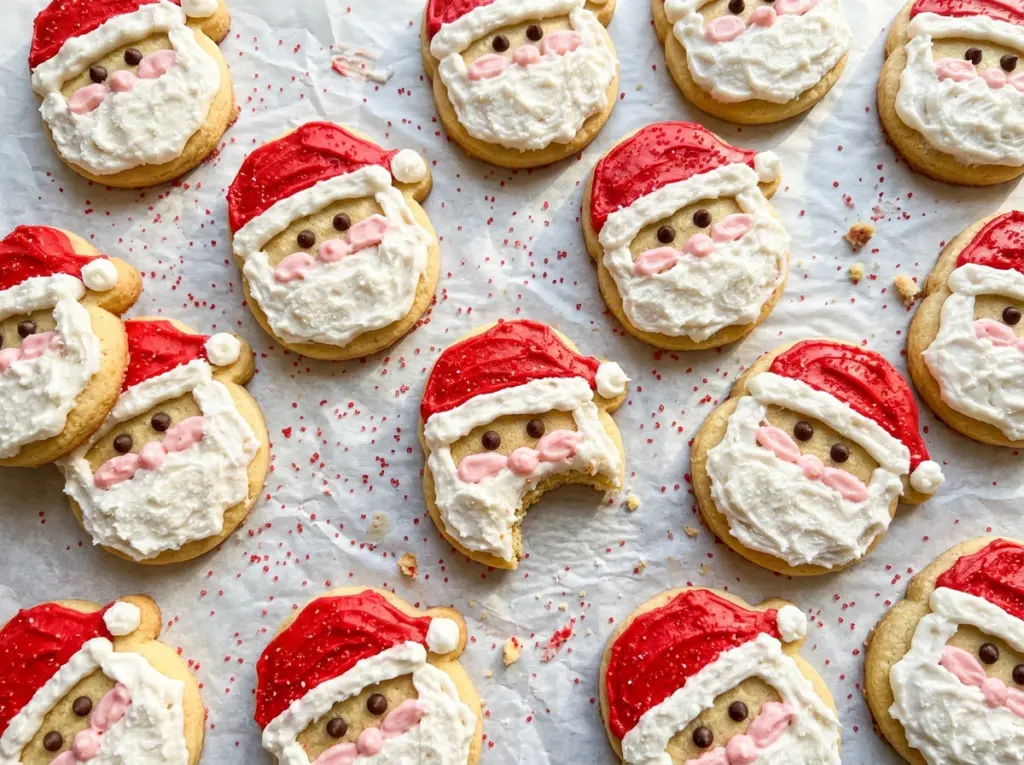
The first time I mixed cake mix with eggs and oil, I expected a cookie dough that would scoop like chocolate chip cookie dough. It was softer and stickier than that, and the refrigerator made all the difference. These Cake Mix Santa Cookies start with a short ingredient list, bake in minutes, and turn into cheerful little Santa faces with a few swipes of frosting.
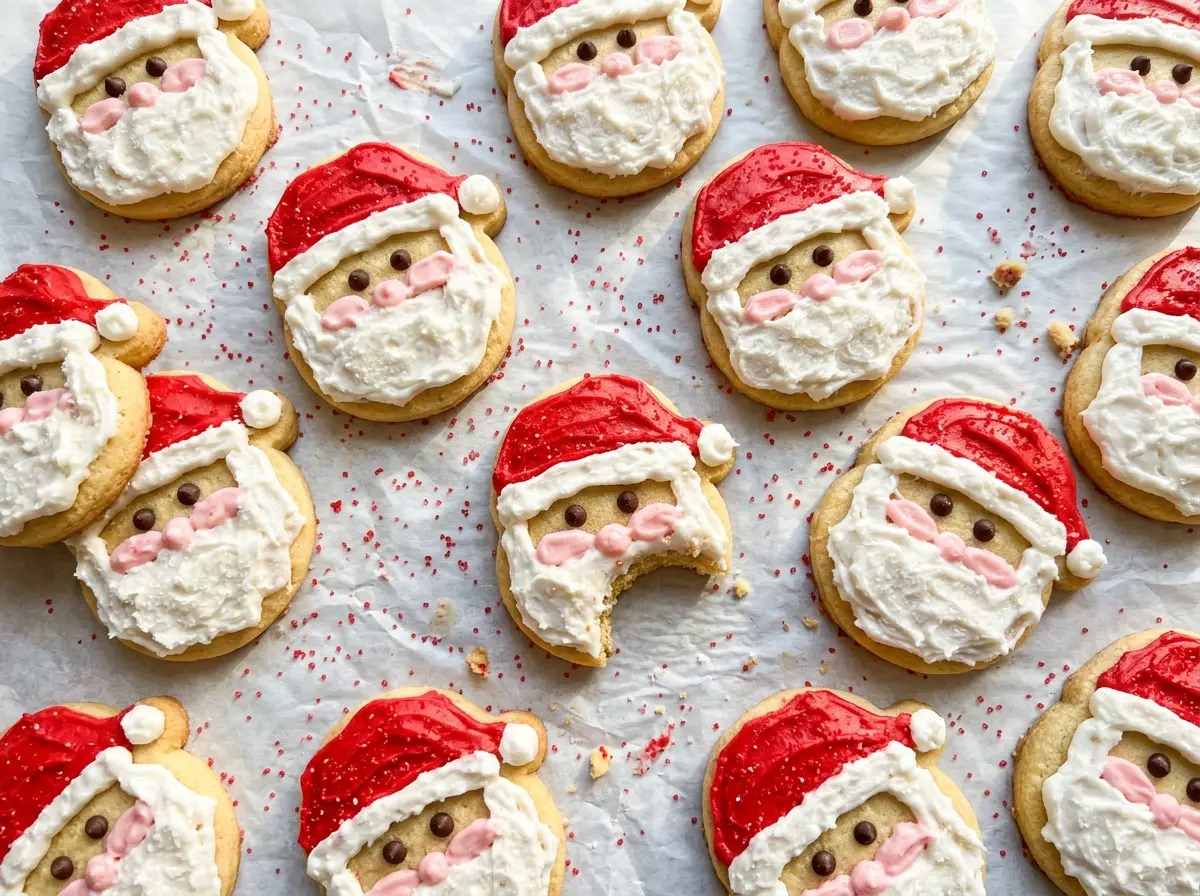
I keep the decorating simple: white frosting becomes the beard, red frosting makes the hat, and the candies do the rest. The trick is letting the cookies cool completely before frosting them; warm cookies soften the decorations and make those neat shapes harder to manage. Once cool, each cookie has a soft, tender center under a sweet frosting finish, with a red sugar hat that catches the light.
Kitchen Note
Let the cookies cool all the way before decorating. If they’re even a little warm, the frosting gets soft and the marshmallow and candies are more likely to shift.
Save these Cake Mix Santa Cookies for a festive bake day: soft cake-mix cookies topped with bright red hats and tiny candy details.
Why a Half-Hour Chill Makes Cake-Mix Dough Easier to Handle
Yellow cake mix dough is softer and tackier than a classic butter-cookie dough. The eggs and oil bring the dry mix together quickly, but right after mixing, it can cling to your scoop and your fingers. Give it the full 30 minutes in the refrigerator before portioning. That short rest firms the dough enough to make level tablespoon portions much easier to manage.
Even portions matter because they bake at the same pace. A rounded scoop that’s noticeably larger than the others may still be soft in the middle when the smaller cookies are ready. Keep the portions level, and leave room between them on the sheet so the cookies can spread without touching. You’ll get a more even batch and a little breathing room for decorating each face.
What Makes These Simple Ingredients Work for Santa Faces

- Yellow cake mix — It gives the cookies their flavor and structure without measuring separate dry baking ingredients. Use the 15.25-ounce size listed for the right dough balance; a basic store-brand mix works just as well as a premium one.
- Eggs and neutral oil — Large eggs help bring the mix together, while canola or vegetable oil keeps the dough tender without adding a strong flavor. Either of those neutral oils works here; avoid swapping in an oil with a pronounced taste.
- Vanilla extract — A standard vanilla extract rounds out the cake-mix flavor. There’s no need for an expensive bottle in a dough with several other sweet, vanilla-forward components.
- Vanilla frosting and red gel coloring — Smooth vanilla frosting spreads into the beard and hat without needing a separate icing. Gel coloring adds a bold red tint without adding much liquid; the remaining frosting stays white for the beard and hat brim.
- Red sanding sugar and small candies — The sanding sugar gives the hats their sparkle, while mini chocolate chips, red candy-coated chocolates, and mini marshmallows make recognizable eyes, noses, and hat tips. Their small size suits the scale of these cookies.
From Soft Dough to Neat Santa Faces
Mix and Chill the Dough
Heat the oven to 350°F and line an 18×13-inch rimmed baking sheet with parchment paper. Stir the cake mix, eggs, oil, and vanilla in a large bowl until no dry mix remains; scrape the bottom of the bowl so no dusty pockets are hiding there. Cover the dough and refrigerate it for 30 minutes. It should feel firmer and less sticky when you scoop it.
Scoop and Bake in Two Batches
Scoop the dough into 24 level tablespoon portions, then arrange 12 portions about 2 inches apart on the prepared sheet. Bake for 10–12 minutes, watching for set edges and lightly golden bottoms. The centers may still look soft, so use the edges and bottoms rather than waiting for the tops to look deeply browned. Let the baking sheet cool before baking the remaining dough.
Cool Before Decorating
Let each batch sit on the baking sheet for 5 minutes, then move the cookies to a wire rack. Give them time to cool completely before adding frosting, or the decorations can slide and lose their clean shapes. Set out the frosting and candies while the cookies cool so everything is ready to decorate. Keep the cookies flat as you move them to the decorating area.
Build the Beard, Hat, and Face
Tint half of the vanilla frosting red with the gel coloring, leaving the remaining frosting white. Spread the white frosting over the lower two-thirds of each cookie, pulling its lower edge into points for a beard. Add a red triangle at the top, leaving a narrow strip of white between it and the beard for the hat brim. Sprinkle the hat with sanding sugar, then press on a mini marshmallow, two mini chocolate chips, and a red candy for the pom-pom, eyes, and nose.
Small Changes for Different Santa Cookie Looks
Make the hats smooth instead of sparkly
Leave off the red sanding sugar and keep the red frosting exposed. The faces still read as Santa, with a smoother hat finish and less crunch on top.
Turn them into Santa-hat cookies
Skip the beard and facial candies, and decorate each cookie with a red triangle, a white brim, sanding sugar, and a marshmallow tip. It’s a simpler design that keeps the same festive colors and takes less decorating time.
Give the beard a little sparkle
For a different finish, sprinkle a little of the red sanding sugar over the white beard instead of covering the hat. The color contrast shifts, and the beard gets a crisp sugar texture; keep the hat plain red so the face stays easy to read.
Storage and Reheating
- Refrigerator: Keep decorated cookies in an airtight container for up to 4 days. The frosting will firm up, and the cookies may become a little less soft.
- Freezer: Freeze plain, undecorated cookies in an airtight container with parchment between layers for up to 2 months. Thaw them before decorating; finished faces are more likely to smear or shift in the freezer.
- Reheating: Don’t microwave decorated cookies, since the frosting softens and the candies can move. Let refrigerated cookies come to room temperature before serving.
Questions That Come Up While Decorating Santa Cookies
Cake Mix Santa Cookies
Ingredients
Equipment
Method
- Heat the oven to 350°F and line an 18x13-inch rimmed baking sheet with parchment paper.
- Stir the yellow cake mix, eggs, neutral oil, and vanilla extract in a large bowl until no dry mix remains.
- Cover and refrigerate the dough for 30 minutes.
- Scoop the dough into 24 level tablespoon portions and arrange 12 portions about 2 inches apart on the baking sheet.
- Bake for 10–12 minutes, until the edges are set and the bottoms are lightly golden. Let the baking sheet cool before baking the remaining dough.
- Cool the cookies on the baking sheet for 5 minutes, then transfer them to a wire rack and cool completely.
- Tint 1/2 cup of the vanilla frosting red with the food coloring, and set the remaining 1 cup of frosting aside.
- Spread the white frosting over the lower two-thirds of each cookie, pulling the lower edge into points to suggest a beard.
- Spread the red frosting in a triangle over the top of each cookie, leaving a narrow strip of white frosting below it for the hat brim.
- Sprinkle the red sanding sugar over the hats, then press one mini marshmallow onto each hat tip, two mini chocolate chips into each cookie for eyes, and one red candy onto each cookie for a nose.




