
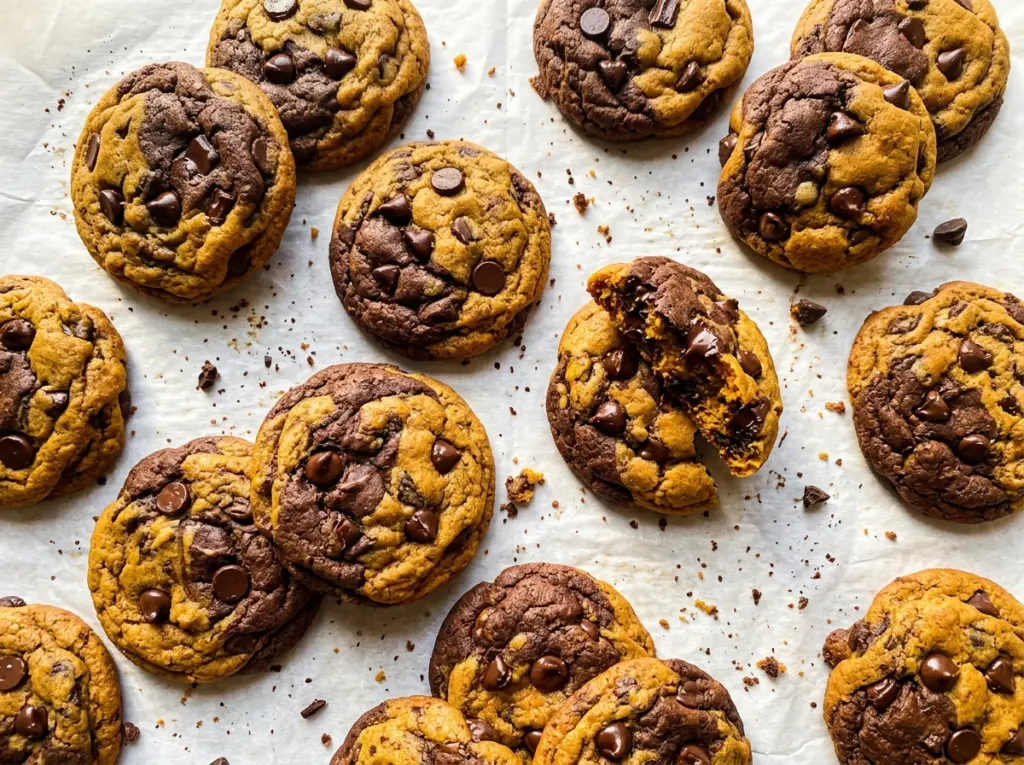
As you pinch the two doughs together, the pale pumpkin dough and cocoa dough turn into a little marbled ball right in your hands. I like that the swirls don’t need to be perfect; each cookie comes out with its own mix of cinnamon-spiced dough and chocolate. These Harvest Marble Chocolate Chip Cookies bring pumpkin into a familiar chocolate chip cookie without burying the chocolate under a heavy pumpkin flavor.
The approach that keeps the contrast visible is to make one dough, then divide it before adding unsweetened cocoa to just one portion. Both halves start with the same buttery, cinnamon-scented base, so their flavors belong together even when the colors stay distinct. A short chill firms the dough, and the oven does the rest: the edges set while the centers still look a little soft. The finished cookies are tender, gently spiced, and streaked with chocolate chips.
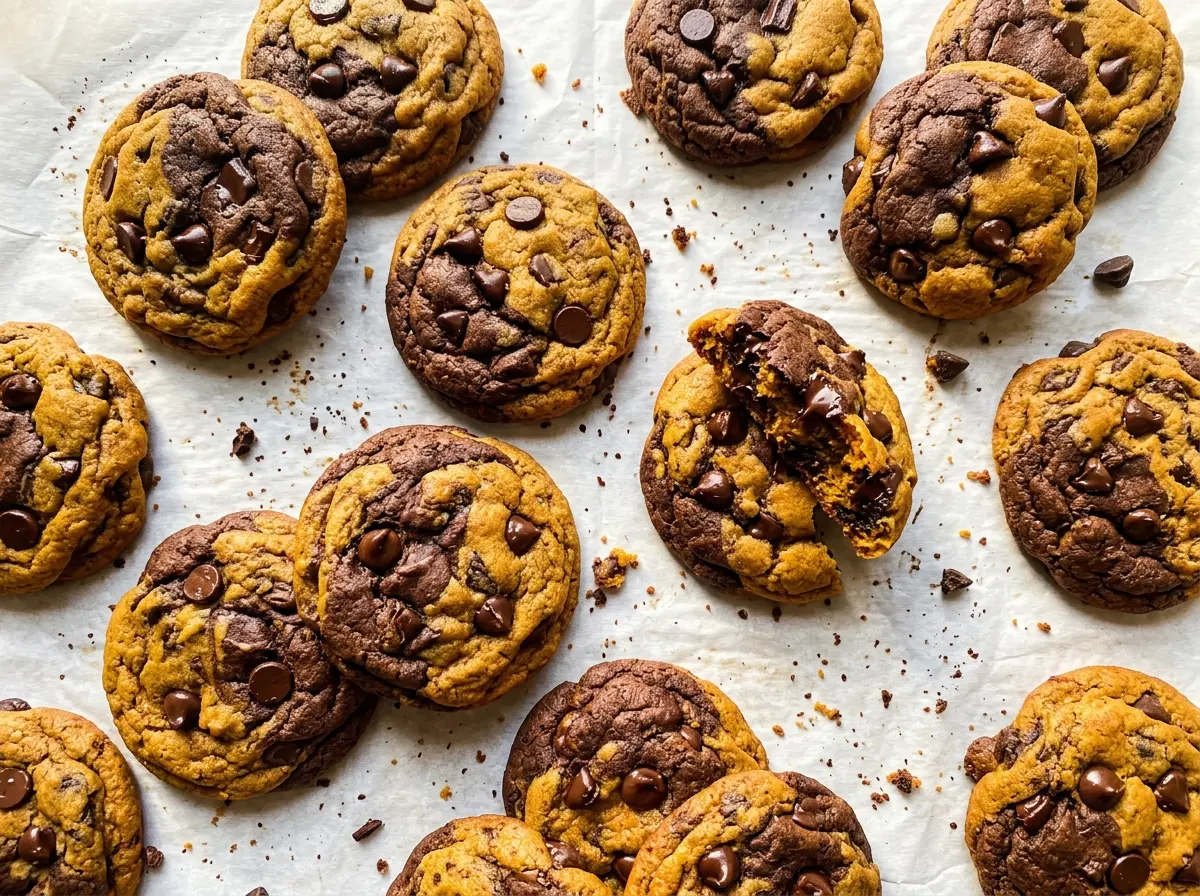
Kitchen Note
After the 45-minute chill, the dough should feel cool and firm enough to handle without sticking to your fingers. If it still feels very soft, give it a little more time in the refrigerator before shaping.
Save these Harvest Marble Chocolate Chip Cookies for a bake with pumpkin-spiced dough, cocoa swirls, and chocolate chips in every bite.
Why the Cocoa Goes Into Only Half the Dough
It’s easy to think of cocoa as just another flavoring, but here it has a job beyond making part of the cookie taste like chocolate. Stirring it into only one half of the dough creates the dark stripe that gives these cookies their marbled look. If cocoa went into the whole batch, you’d have chocolate cookies with chips, not two distinct doughs in one cookie.
Dividing the dough before adding cocoa also keeps the pumpkin-spice portion recognizable. That matters because pumpkin, cinnamon, and nutmeg bring a mild, warm flavor that can get lost when chocolate takes over. The cocoa half is intentionally unsweetened; the brown sugar and chocolate chips already bring sweetness to both parts. When you bring a small piece of each dough together, keep the colors in loose patches rather than kneading them into one even shade. A little irregularity is what makes the finished marbling look natural.
This is a two-dough cookie, not a layered one. You don’t need separate mixing bowls for the full recipe or a careful patterning technique. One dough gets divided, one portion gets cocoa, and both portions get chocolate chips before they’re shaped together.
What Makes the Pumpkin Dough and Cocoa Dough Work Together

- Canned pumpkin puree — Plain puree gives the dough its pumpkin character and moisture. Choose a can labeled pumpkin puree, not pumpkin pie filling, which is already sweetened and spiced. There’s no need for a specialty brand; a standard canned puree works well.
- Unsalted butter and brown sugar — Softened butter creams with the sugars to form the base, while packed light brown sugar contributes moisture and a mild molasses note. Use butter that yields to a light press but hasn’t melted; melted butter won’t cream the same way.
- All-purpose flour — Flour gives the soft dough enough structure to hold its shape after the cocoa is mixed in. A standard all-purpose flour is the right fit here; pastry flour would make the cookies more delicate, not sturdier.
- Unsweetened cocoa powder — This is what colors and flavors one half of the dough without adding more sugar. Use unsweetened cocoa rather than a sweetened drink mix, which would make the chocolate portion sweeter and less predictable.
- Cinnamon and nutmeg — Together, these spices give the pumpkin half its warm, familiar character without making it taste like pumpkin pie filling. Ground spices are fine for this recipe; use fresh, aromatic spices if yours have been open for a long time.
- Semisweet chocolate chips — Semisweet chips balance the sweeter dough and hold their shape as the cookies bake. A regular bag from the baking aisle is all you need; save premium chocolate for a recipe where its texture and flavor stand alone.
Mixing, Marbling, and Baking Without Losing the Swirls
Cream the Butter and Build the Dough
Heat the oven to 350°F and line two 18×13-inch baking sheets with parchment paper. Beat the softened butter with the packed light brown sugar and granulated sugar on medium speed for 2–3 minutes, until the mixture looks creamy. Beat in the egg, pumpkin puree, and vanilla until smooth; scrape the bowl if streaks of butter remain along the sides. In a separate bowl, whisk the flour, baking soda, salt, cinnamon, and nutmeg together so the leavening and spices are evenly distributed.
Add the Dry Ingredients and Divide
Add the flour mixture to the butter mixture in two additions, mixing on low just until combined. Stop when the last dry patches disappear; extended mixing can make cookies tougher. Transfer half of the dough to the medium bowl. Stir the cocoa powder into the dough left in the large bowl, mixing only until the color looks even.
Fold in the Chips and Chill
Fold half of the chocolate chips into each dough, keeping the portions separate. Cover both bowls and refrigerate the dough for 45 minutes. This rest gives the soft pumpkin dough time to firm up, which makes it easier to portion and keeps the two colors from smearing together too readily. Don’t combine the doughs during this stage; the marbling happens when you shape each cookie.
Shape the Cookies and Bake Until the Edges Set
Pinch off about 1 tablespoon of each dough, press the pieces gently together, and roll them into a ball. Make 24 cookies, arranging 12 on each prepared sheet about 2 inches apart, then flatten each one slightly. Bake the sheets on the upper and lower racks for 12–14 minutes, switching racks and rotating the sheets front to back halfway through. Take them out when the edges are set but the centers still look slightly soft, then cool them on the sheets for 5 minutes before moving them to a wire rack.
Easy Ways to Change the Chocolate or Flour
Use White Chocolate Chips for a Sweeter Contrast
Replace the semisweet chips with white chocolate chips, keeping the same total amount and dividing them between the two doughs. The cookies will taste sweeter and creamier, while the white chips stand out against the cocoa swirls.
Make a Gluten-Free Batch
Swap the all-purpose flour for an equal amount of a cup-for-cup gluten-free baking blend made for cookies. A blend that includes xanthan gum gives the dough needed structure; expect a slightly more delicate cookie, and handle the shaped dough gently.
Storage and Reheating
- Refrigerator: Keep baked cookies in an airtight container for up to 5 days. They’ll firm up and lose a little softness compared with the day they’re baked.
- Freezer: Freeze cooled cookies in a sealed freezer-safe container for up to 2 months, separating layers with parchment so they don’t stick together. Thaw at room temperature.
- Reheating: Warm a cookie in a 300°F oven for 3–4 minutes, or microwave it briefly until just warm. Don’t heat it until the chocolate is fully melted; the cookie can turn greasy and overly soft.
Questions That Come Up With These Marble Cookies
Harvest Marble Chocolate Chip Cookies
Ingredients
Equipment
Method
- Heat the oven to 350°F and line two 18x13-inch baking sheets with parchment paper.
- In a large bowl, beat the butter, brown sugar, and granulated sugar with a mixer on medium speed for 2–3 minutes, until creamy.
- Beat in the egg, pumpkin puree, and vanilla until smooth.
- In a medium bowl, whisk together the flour, baking soda, salt, cinnamon, and nutmeg.
- Add the flour mixture to the butter mixture in two additions, mixing on low just until combined.
- Transfer half the dough to the medium bowl.
- Stir the cocoa powder into the dough left in the large bowl.
- Fold 1/2 cup chocolate chips into each portion.
- Cover both bowls and refrigerate the dough for 45 minutes.
- Pinch off about 1 tablespoon of each dough, gently press the pieces together, and roll into a ball.
- Make 24 cookies, arranging 12 on each baking sheet about 2 inches apart, and flatten them slightly.
- Bake on the upper and lower racks for 12–14 minutes, switching the sheets between racks and rotating them front to back halfway through, until the edges are set and the centers still look slightly soft.
- Cool the cookies on the sheets for 5 minutes.
- Transfer the cookies to a wire rack.




