
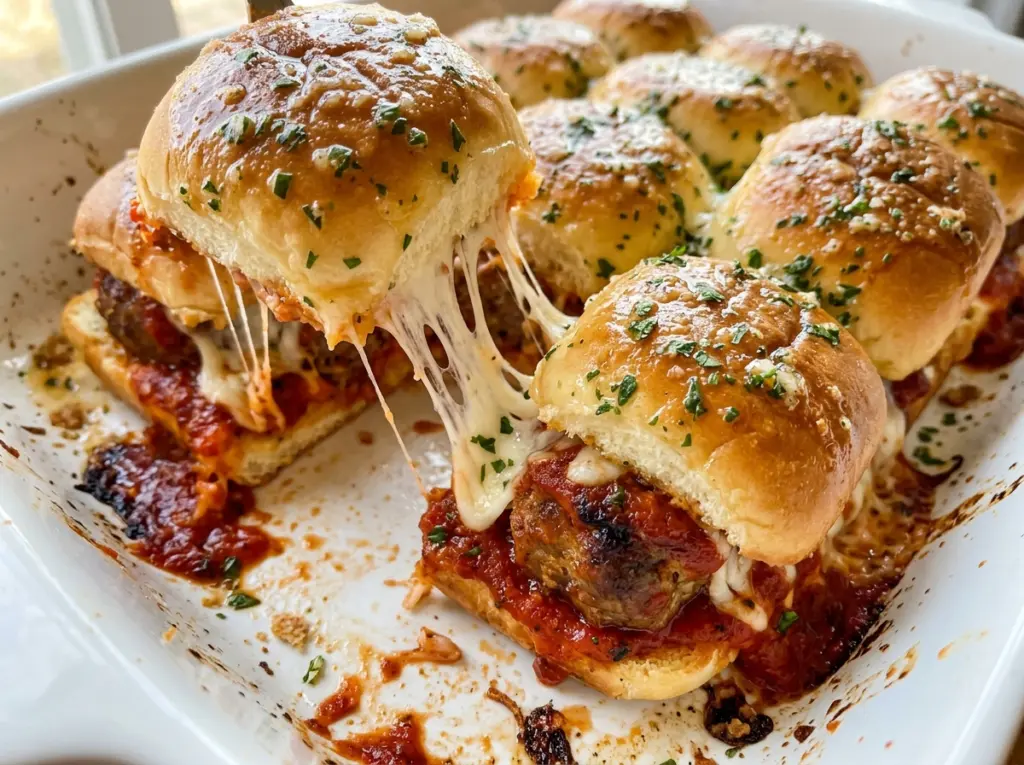
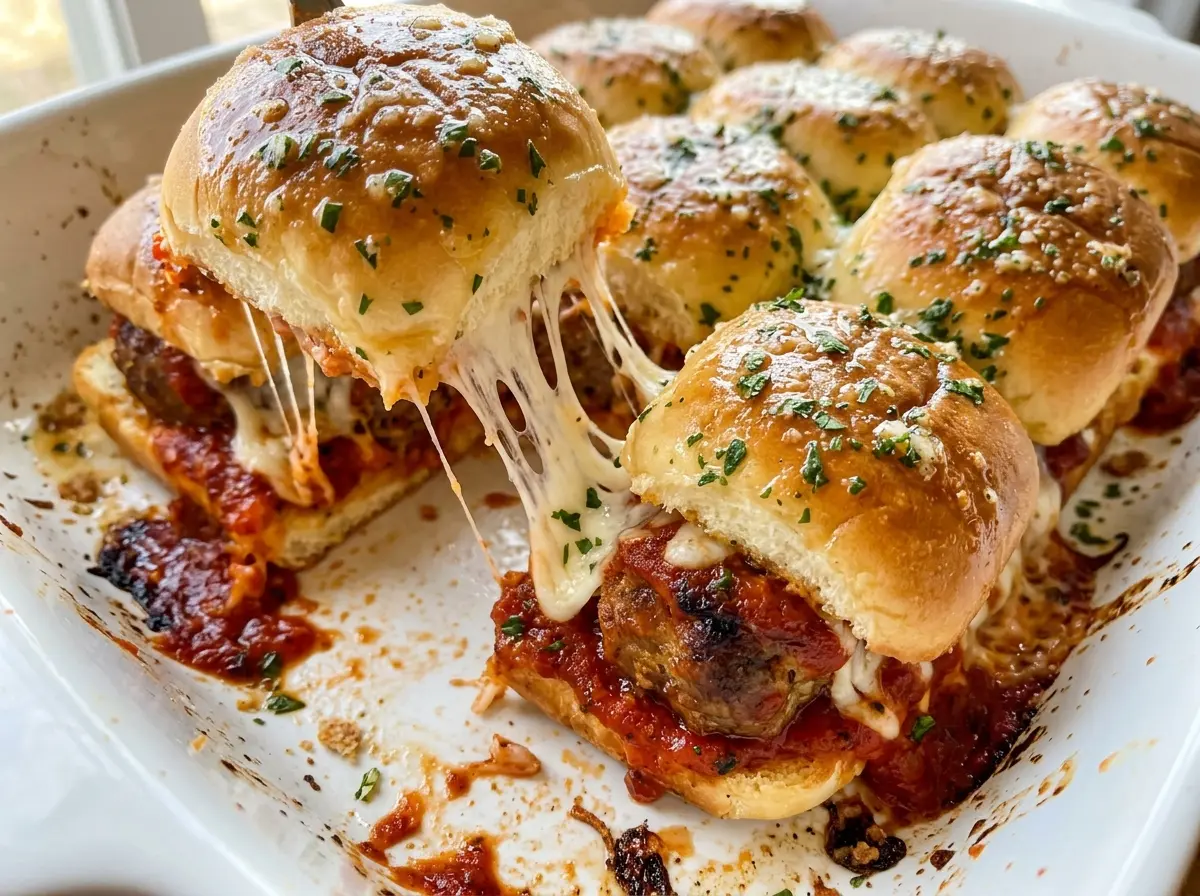
When the foil comes off, the Hawaiian rolls are still soft and pale, and the cheese is only beginning to melt. That last stretch in the oven is when the tops turn lightly golden and the mozzarella settles around the meatballs. I like serving these meatball sliders while the cheese is still stretchy, but a short rest makes them much easier to separate without losing the filling.
The sweet rolls bring a tender, lightly sweet contrast to savory beef and marinara, and the whole slab fits neatly into a 9×13-inch baking dish. Making the meatballs first gives them a chance to cook through before they meet the bread. Then everything gets its final bake together, so the rolls warm without needing a long time in the oven. Each slider comes out saucy, cheesy, and easy to pick up.
Kitchen Note
Stop mixing as soon as the ingredients come together; the meat mixture should look evenly combined, not smooth or paste-like. A light hand keeps the baked meatballs tender instead of tight and springy.
Save these meatball sliders on Hawaiian rolls for a party-ready pan of saucy meatballs, melted mozzarella, and golden garlic-butter tops.
Why These Sliders Need Two Oven Temperatures
The meatballs and the rolls need different kinds of heat. The meatballs start in a hotter oven, which cooks the beef before it goes into the assembled sliders. Once they’re baked, the oven comes down for the rolls. That gentler second bake warms the filling and melts the cheese while the soft bread stays tender.
Keeping those stages separate also gives you a clear doneness check before assembly. Ground beef can brown on the outside before the center is ready, so the instant-read thermometer matters more than the surface color. After the meatballs are cooked, the final bake is about melting and browning, not cooking raw beef inside a bun. Don’t rush the oven change: the higher temperature that works for the meatballs can overbrown the sweet rolls before the cheese has time to melt.
The switch is easy to manage while you assemble the sliders. Lower the oven after the meatballs come out, grease the baking dish, and build the sandwiches while the oven settles at its new temperature. That gives the cheese and rolls a short, controlled finish instead of asking one oven setting to do two jobs.
What Gives the Meatballs Their Tender Bite—and the Rolls Their Pull

- Ground beef — 85% lean beef has enough fat to keep the meatballs moist without making the filling feel greasy. A standard grocery-store package works well here; extra-lean beef tends to bake up firmer.
- Italian-style breadcrumbs, egg, and milk — Together, these ingredients bind the beef while keeping the mixture soft. Italian-style crumbs bring seasoning with them, so plain breadcrumbs won’t taste quite the same unless they’re seasoned. If the crumbs look dry as you combine the mixture, keep mixing gently until the egg and milk are evenly distributed.
- Parmesan, garlic, and Italian seasoning — These give the beef its savory Italian-style flavor before it meets the marinara. Finely grated Parmesan blends into the mixture more evenly than large shreds, and fresh garlic gives a brighter flavor than jarred minced garlic.
- Hawaiian sweet rolls — Their soft crumb and mild sweetness balance the tomato sauce and savory meatballs. Choose a fresh, intact package so the rolls slice cleanly as one slab; the low-cost package works just as well as a name brand.
- Low-moisture mozzarella — It melts into a stretchy layer without adding the extra water that fresh mozzarella can release. Pre-shredded cheese is convenient here; freshly shredded low-moisture mozzarella usually melts more smoothly.
- Marinara and garlic butter — A familiar jarred marinara is a good fit because it brings enough seasoning for the meatballs and buns. The melted butter mixed with garlic powder gives the roll tops their savory finish without adding another sauce to the filling.
From Baked Meatballs to Golden Slider Tops
Mix and Shape the Meatballs
Heat the oven to 400°F and line a rimmed baking sheet with parchment paper. Add the beef, breadcrumbs, egg, milk, Parmesan, garlic, Italian seasoning, salt, and pepper to a large bowl, then mix until just combined. Shape the mixture into 12 meatballs and arrange them on the prepared sheet. Keep them similar in size so they finish cooking at about the same time.
Bake Until the Centers Are Cooked
Bake the meatballs for 15–18 minutes. The outside should look browned, but color alone doesn’t tell you whether the centers are cooked through. Check the center of a meatball with an instant-read thermometer; it should reach 160°F. If it needs longer, return the pan to the oven and check again rather than relying on the timer alone.
Coat the Meatballs and Build the Slab
Reduce the oven to 350°F and grease a 9×13-inch baking dish. Slice the rolls horizontally as one connected slab, then set the bottom half in the dish. Warm the marinara in a 2-quart saucepan over medium-low heat, add the baked meatballs, and simmer for 3–5 minutes, turning them gently so the sauce coats them. Arrange them over the roll bottoms, spoon the remaining sauce evenly over the meatballs, add the mozzarella, and set the roll tops in place.
Brush, Bake, and Rest Before Pulling Apart
Stir the melted butter and garlic powder together, then brush the mixture over the roll tops. Cover the dish loosely with foil and bake for 10 minutes. Uncover and bake for another 5–8 minutes, until the cheese is melted and the tops are lightly golden; if the rolls are still pale, use the visual cue rather than taking them out early. Rest the sliders for 5 minutes before separating them so the cheese and filling settle into place.
Two Smart Ways to Adapt These Meatball Sliders
Make a Gluten-Free Pan
Use gluten-free Italian-style breadcrumbs in place of the regular crumbs, and choose 12 gluten-free sweet rolls that fit your baking dish. The meatballs will still hold together, though the crumb texture and sweetness of the rolls may differ from the original. Keep the remaining ingredients and method the same.
Give Every Slider More Toasted Edges
For more exposed, lightly browned edges, separate the rolls after slicing instead of keeping them connected as one slab. Arrange the bottoms snugly in the greased dish, add the meatballs, sauce, and cheese, then set the tops in place and continue with the same bake. The sides will toast more, though individual rolls are a little less tidy to assemble.
Storage and Reheating
- Refrigerator: Store leftover sliders in an airtight container for 3 to 4 days. The rolls soften as they sit with the sauce.
- Freezer: Freeze cooled sliders in an airtight freezer container for up to 2 months. The bread may soften after thawing, but the meatballs and cheese freeze well.
- Reheating: Reheat covered in a 350°F oven until the centers reach 165°F, then uncover briefly to refresh the tops. Avoid reheating uncovered for the entire time, which can dry out the rolls.
Questions That Come Up While Making These Sliders
Meatball Sliders on Hawaiian Rolls
Ingredients
Equipment
Method
- Heat the oven to 400°F.
- Line a rimmed baking sheet with parchment paper.
- Gently mix the ground beef, breadcrumbs, egg, milk, Parmesan, garlic, Italian seasoning, salt, and pepper in a large bowl until just combined.
- Shape the mixture into 12 meatballs and place them on the baking sheet.
- Bake for 15–18 minutes, until the centers reach 160°F on an instant-read thermometer.
- Reduce the oven temperature to 350°F.
- Grease a 9x13-inch baking dish.
- Slice the rolls horizontally as one slab and place the bottom half in the dish.
- Warm the marinara in a 2-quart saucepan over medium-low heat.
- Add the meatballs and simmer for 3–5 minutes, turning them gently to coat.
- Arrange the meatballs over the roll bottoms and spoon the remaining sauce evenly over them.
- Sprinkle with mozzarella and place the roll tops over the cheese.
- Stir the melted butter and garlic powder together.
- Brush the butter mixture over the roll tops.
- Cover loosely with foil and bake for 10 minutes.
- Uncover and bake for 5–8 minutes, until the cheese is melted and the tops are lightly golden.
- Let the sliders rest for 5 minutes before separating and serving.




