
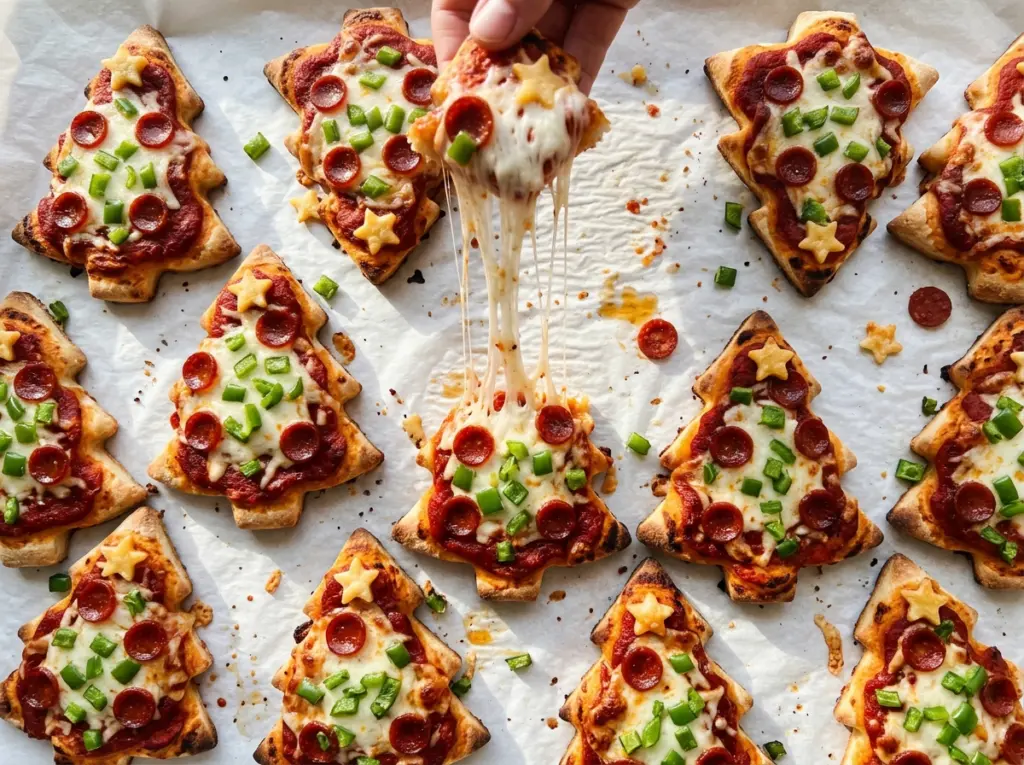
The little points and branch-shaped edges are what make these pizzas look like Christmas trees, but they’re also the spots that can brown before the centers are ready. I keep the dough an even quarter-inch thick and give the trees room on two baking sheets, so the crust cooks through without losing its shape. These Christmas Tree Mini Pizzas turn one package of refrigerated dough into 12 hand-held, cheese-topped bites.
Letting the dough sit at room temperature for 20 minutes makes it much easier to roll evenly and cut cleanly. I keep the sauce inside a narrow border, then scatter the mozzarella, mini pepperoni, and finely chopped green bell pepper across the surface so every bite gets a little of each. Once the cheese bubbles and the edges turn golden, the pizzas need a short rest on the sheets before serving.
Kitchen Note
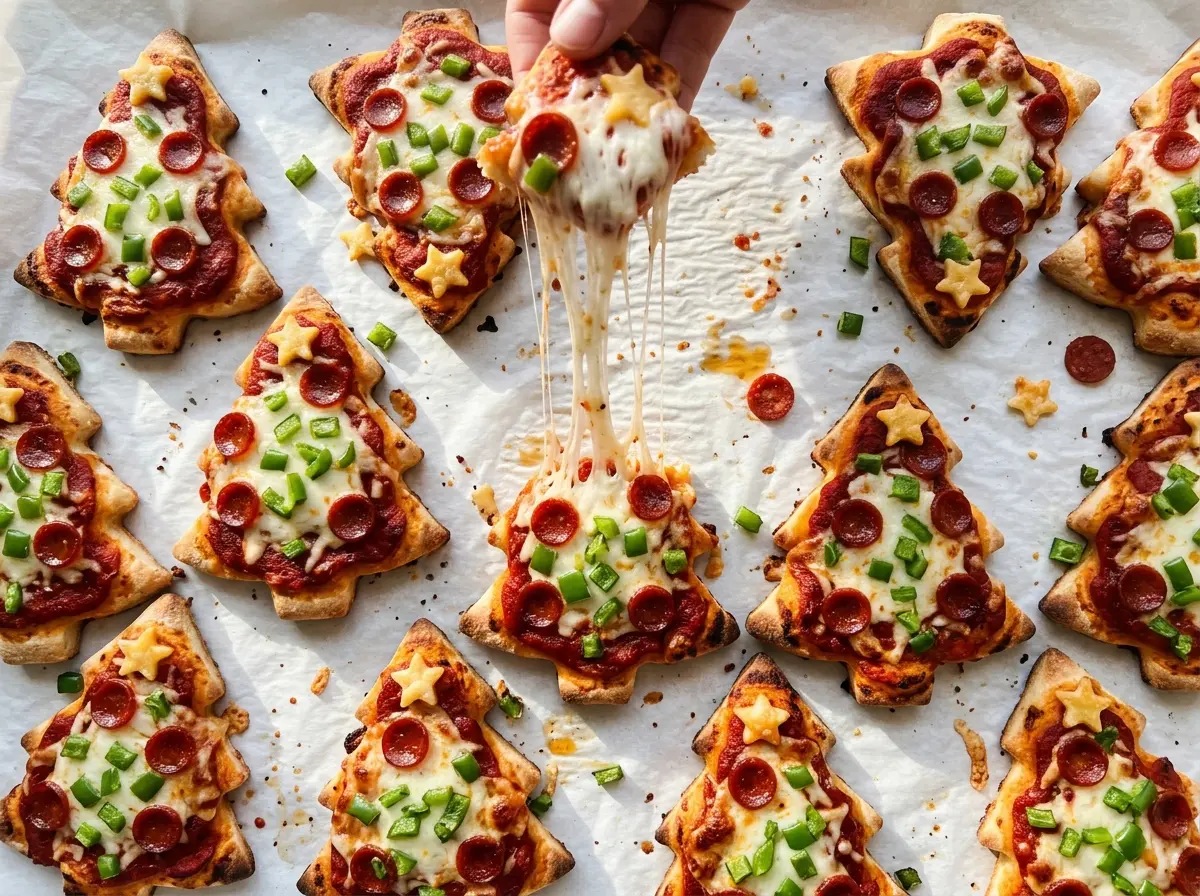
Don’t skip the halfway sheet swap. Moving the pans between racks and turning them front to back helps the trees bake more evenly when two sheets are in the oven together.
Save these Christmas Tree Mini Pizzas for a festive snack with golden crusts, bubbling mozzarella, and bright green pepper.
Why a Thin Sauce Layer Matters More on a Tiny Tree Crust
On a small pizza, sauce can reach the edge in just a couple of strokes. Leave a narrow border around each tree instead of coating the entire cutout. That uncovered edge gives the crust room to brown, and it helps keep sauce from creeping onto the baking sheet as the dough puffs in the oven.
Use the stated two teaspoons per tree as a guide, spreading the sauce in a thin layer rather than piling it in the middle. A heavy pool of sauce can leave the center softer while the pointed branches are already turning golden. Keep the toppings distributed across the tree, too; a mound in the center weighs down the dough and leaves the edges comparatively bare. The small portions are part of what makes these easy to pick up once they’ve rested.
That border also makes the tree shape easier to see after baking. The exposed crust traces the branches and trunk, while the sauce and toppings stay in the middle. It’s a small detail, but it gives each mini pizza a cleaner outline without needing a separate decoration or garnish.
What Each Topping Does on These Little Pizza Trees

- Refrigerated pizza dough — This gives you a consistent base without mixing or proofing dough first. Let it come to room temperature before rolling; cold dough is harder to flatten evenly and can pull back as you cut. Use the package as sold, since a different dough may need a different amount of flour or handling.
- All-purpose flour — A light dusting keeps the dough from sticking to the work surface. Add only what you need to roll and cut; working excess flour into the dough can make the finished crust less tender. There isn’t another listed ingredient that can do this job.
- Olive oil — Brushing it on the edges encourages the exposed crust to turn golden. Apply it to the border rather than across the sauced center, where it isn’t needed. The clean olive-oil flavor works well here, and there’s no reason to use an expensive bottle for brushing.
- Pizza sauce — Its seasoned tomato base gives the toppings something to sit on without adding a separate sauce-making step. Keep it within the crust border and use pizza sauce rather than assuming another tomato product will have the same thickness and seasoning.
- Shredded mozzarella — Mozzarella melts into the stretchy, bubbling layer that holds the small toppings in place. Use shredded mozzarella for even coverage; a different cheese would change both the melt and the flavor, and isn’t a direct swap in this combination.
- Mini pepperoni and green bell pepper — The small pepperoni pieces suit the compact trees, while finely chopped bell pepper spreads color and a fresh crunch across the cheese. Chop the pepper finely so it’s easy to distribute. If you leave either topping off, the pizzas will still bake, but that bite will lose its particular salty or crisp contrast.
Cut, Top, and Bake the Trees Without Losing Their Shape
Give the Dough Time to Relax
Heat the oven to 425°F and line two 13×18-inch rimmed baking sheets with parchment paper. Let the refrigerated dough sit at room temperature for 20 minutes before rolling. Dust the work surface lightly with flour, then roll the dough to a uniform 1/4-inch thickness. An even sheet helps the narrow branches and wider centers bake at the same pace.
Cut Clean Trees and Use the Scraps Once
Press a 4-inch Christmas tree cookie cutter through the rolled dough to cut out 12 trees. Lift each cutout carefully so the pointed top and branch edges stay intact. Gather the scraps and reroll them once as needed to make the remaining trees; repeated rerolling can make the dough tougher. Set six trees on each prepared baking sheet.
Keep the Toppings Inside the Border
Brush the edges of each tree with olive oil. Spread two teaspoons of pizza sauce on each one, stopping short of the edge to leave a narrow border. Divide the mozzarella, mini pepperoni, and finely chopped green bell pepper among the trees, spreading them out rather than stacking everything in the middle. That even layer helps the cheese melt across the crust instead of hiding the tree shape.
Watch for Bubbling Cheese and Golden Edges
Bake for 10–13 minutes, swapping the sheets between racks and rotating them front to back halfway through. Look for golden crusts and cheese that’s bubbling; the narrow tips may color a little faster than the centers. Let the pizzas rest on the baking sheets for 5 minutes before serving. The cheese will settle, and the crust will be easier to lift without bending the trees.
Two Easy Ways to Change the Topping Mix
Vegetarian Trees with Mozzarella and Green Pepper
Leave off the mini pepperoni and divide the mozzarella and chopped green bell pepper among the trees. The result keeps the cheese-and-pepper combination while skipping the meat topping; the bites will be less salty and more focused on the mild pepper.
Cheese-Only Trees for Picky Topping Preferences
Leave off both the mini pepperoni and green bell pepper, keeping the pizza sauce and mozzarella. The simpler topping lets the browned crust and melted cheese stand out, though you’ll lose the pepper’s crunch and the pepperoni’s savory bite.
Storage and Reheating
- Refrigerator: Refrigerate leftovers within 2 hours in a covered container and eat them within 3 days. The crust softens as it sits under the toppings.
- Freezer: Once cooled, freeze the pizzas in a single layer until firm, then transfer them to a freezer-safe container. Use within 2 months for the best texture.
- Reheating: Warm them on a baking sheet in a 425°F oven until the cheese is hot and the crust is crisp again. Avoid the microwave if you want a firmer crust; it tends to make the dough soft.
Questions That Come Up While Making Christmas Tree Mini Pizzas
Christmas Tree Mini Pizza
Ingredients
Equipment
Method
- Heat the oven to 425°F and line two 13x18-inch rimmed baking sheets with parchment paper.
- Let the dough sit at room temperature for 20 minutes.
- Lightly dust the work surface with flour and roll the dough to 1/4-inch thickness.
- Cut out 12 trees with a 4-inch Christmas tree cookie cutter, rerolling the scraps once as needed.
- Arrange 6 trees on each baking sheet.
- Brush the edges of the trees with the olive oil.
- Spread 2 teaspoons pizza sauce on each tree, leaving a narrow border.
- Divide the mozzarella, mini pepperoni, and green bell pepper among the trees.
- Bake for 10–13 minutes, swapping the sheets between racks and rotating them front to back halfway through, until the crusts are golden and the cheese is bubbling.
- Let the pizzas rest on the sheets for 5 minutes before serving.




